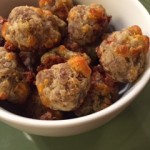
Sausage balls with cream cheese
Sausage balls are a perennial favorite at holiday parties and open houses. But frankly I think they can be really dry. So I hadn't bothered to make them before. However, I found this recipe from big oven that adds cream cheese to the recipe and let me tell you, that simple addition makes all the … [Read More...]
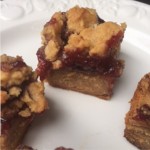
Peanut Butter & Jelly Bars
Peanut butter and Jelly. For some, a quintessential childhood lunchtime memory. For me not so much….. brought up British, honestly it was not even on my radar! Still, for most, just the mention of PBJ brings out the kid in them (just like pigs in a blanket). So when I made these Peanut Butter and … [Read More...]
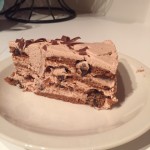
Mocha Chocolate Icebox Cake
I'd wanted to make this Mocha Chocolate Icebox Cake, from "Barefoot Contessa" Ina Garten for a while. So when I walked into Costco and found large boxes of Tate's Chocolate Chip Cookies, a key ingredient, I knew it was time. I brought it to our Christmas Eve dinner last year and received rave … [Read More...]

Super Bowl Eats
I’ve been traveling for a bit… so now I'm in a rush to decide what to make for Super Bowl 50, this weekend. If you’re still looking for some ideas for Super Bowl eats? Look no further….. here's lot's of ideas for your party spread. Baked Zucchini Sticks Chicken Enchilada … [Read More...]
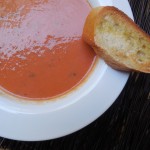
Winter Soups
Well winter finally hit with a vengeance this week and a major snowstorm is due for the northeast. Atlantans woke up to temps in the teens this week. Yikes!! Thanks goodness for bun warmers in my car – how did I get along without them. I even turned on the bun warmers in the back seat for Maggie … [Read More...]
